I/ TheHive
TheHive is a Security Incident Response Platform, a case management for the security team. The case management is used to create and track the security incidents, monitor the investigation progress. Centralize the alerts from the SIEM, and allows the collaboration between the analysts. TheHive separates the concept of Alert, Case, Task, and Observable. Every event that has matched a detection rule in the SIEM will be sent as an Alert to TheHive. Alerts are changed into a case if an investigation is needed.
1. Installation
2 ways of installation: local installation (run by services) or docker container.
- Download thehive4:
https://deb.thehive-project.org
Dpkg -I thehive.deb -
Docker container: clone the follow github repository:
https://github.com/HakkYahud/THC
After running env.sh, it will generate .env in the current directory.
PUBLIC_APP_URL = URL TO ACCESS TO TRACECAT
PUBLIC_API_URL = PUBLIC_APP_URL/api
CADDY env var
BASE_DOMAIN = :80
ADDRESS = 0.0.0.0
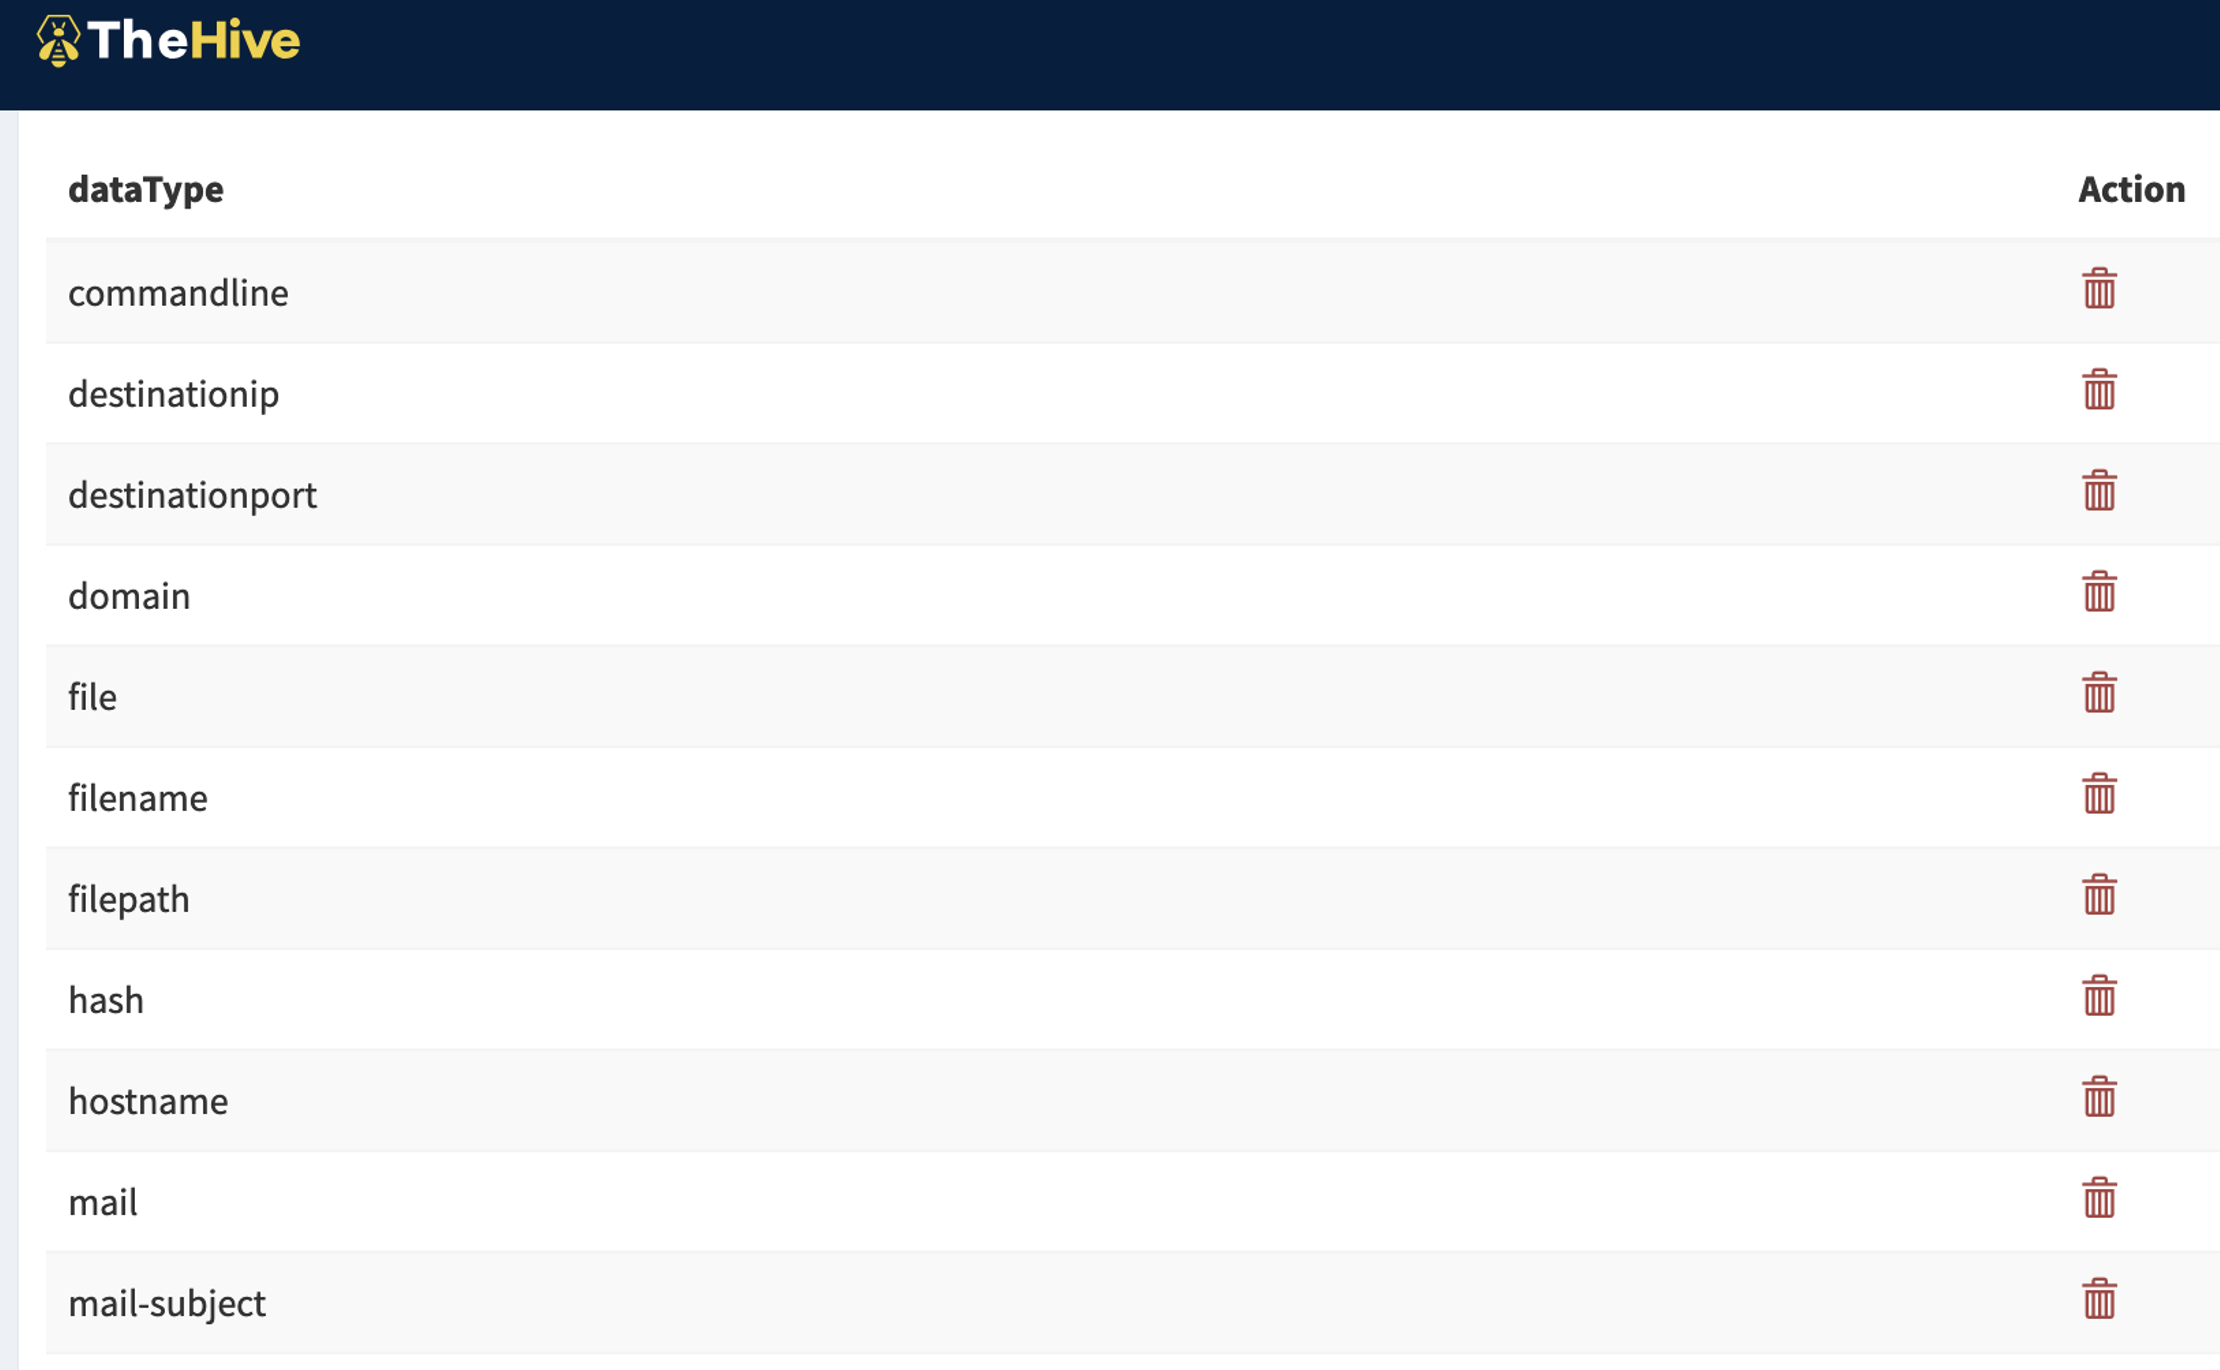
2. Observables
Observable types are configured in the Administrators space: open Entities Management and select the Observable types tab.
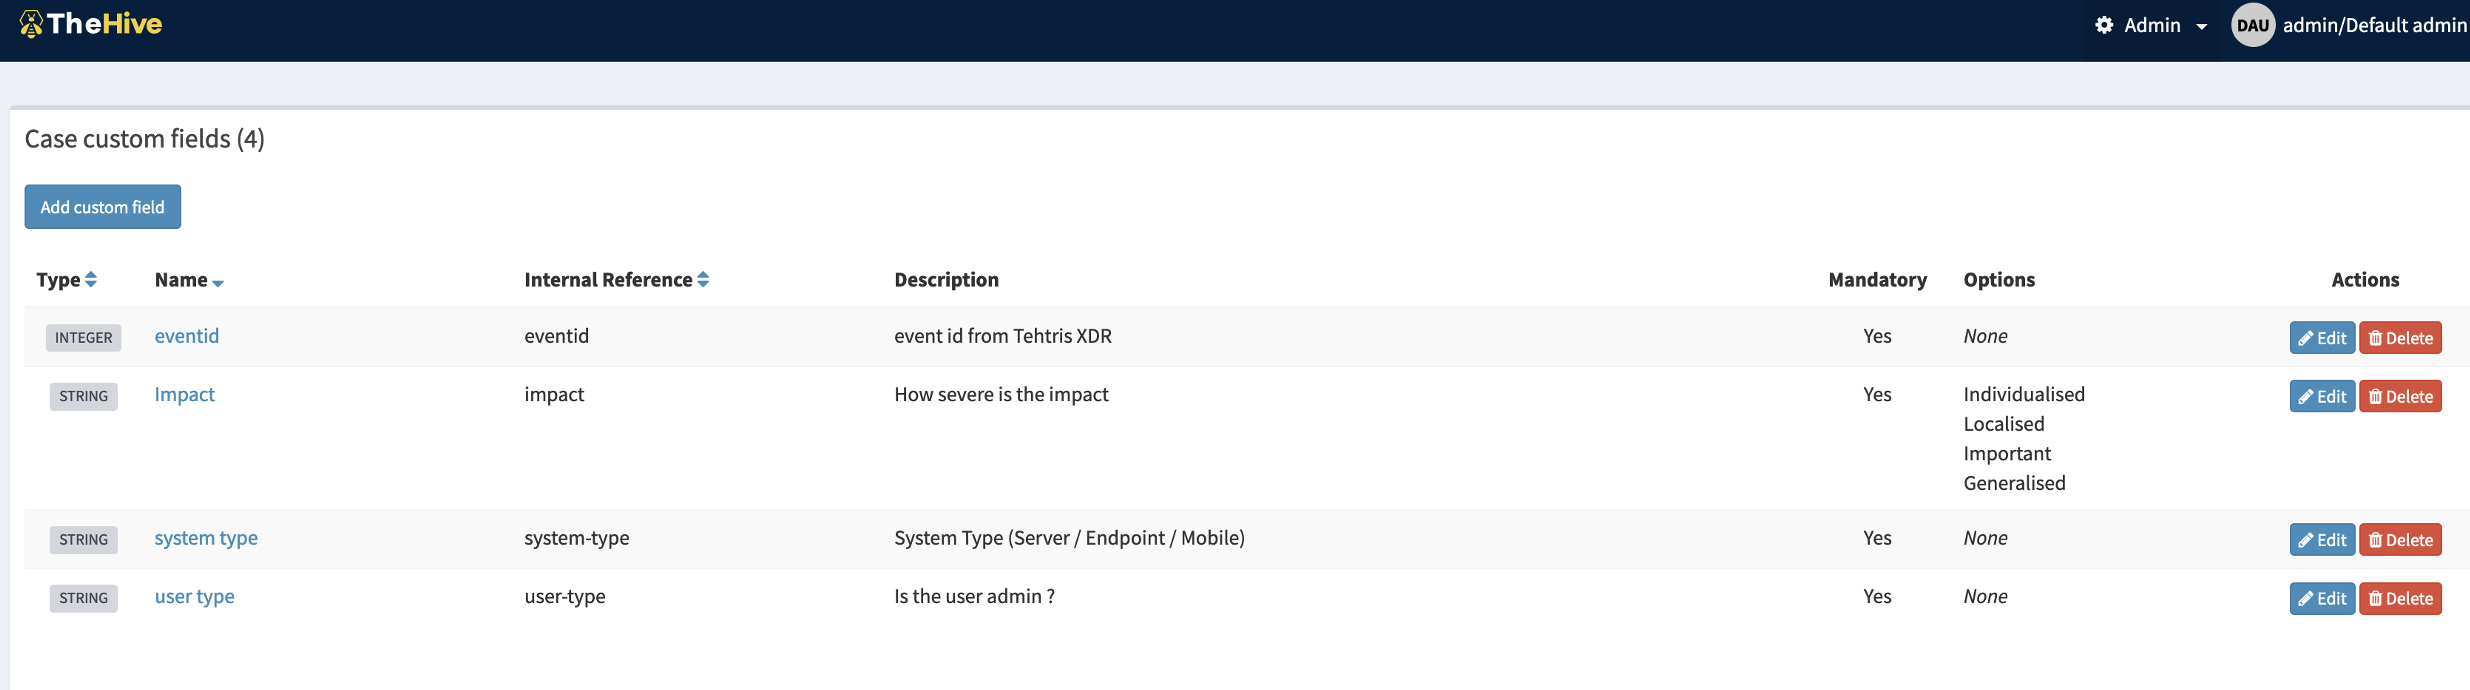
3. Custom field
Custom fields are fields that could be added to multiple cases. Field such as urgency, impact are not present and some organizations require those fields to be filled during an investigation. On TheHive4, connect as Admin and add case custom field.
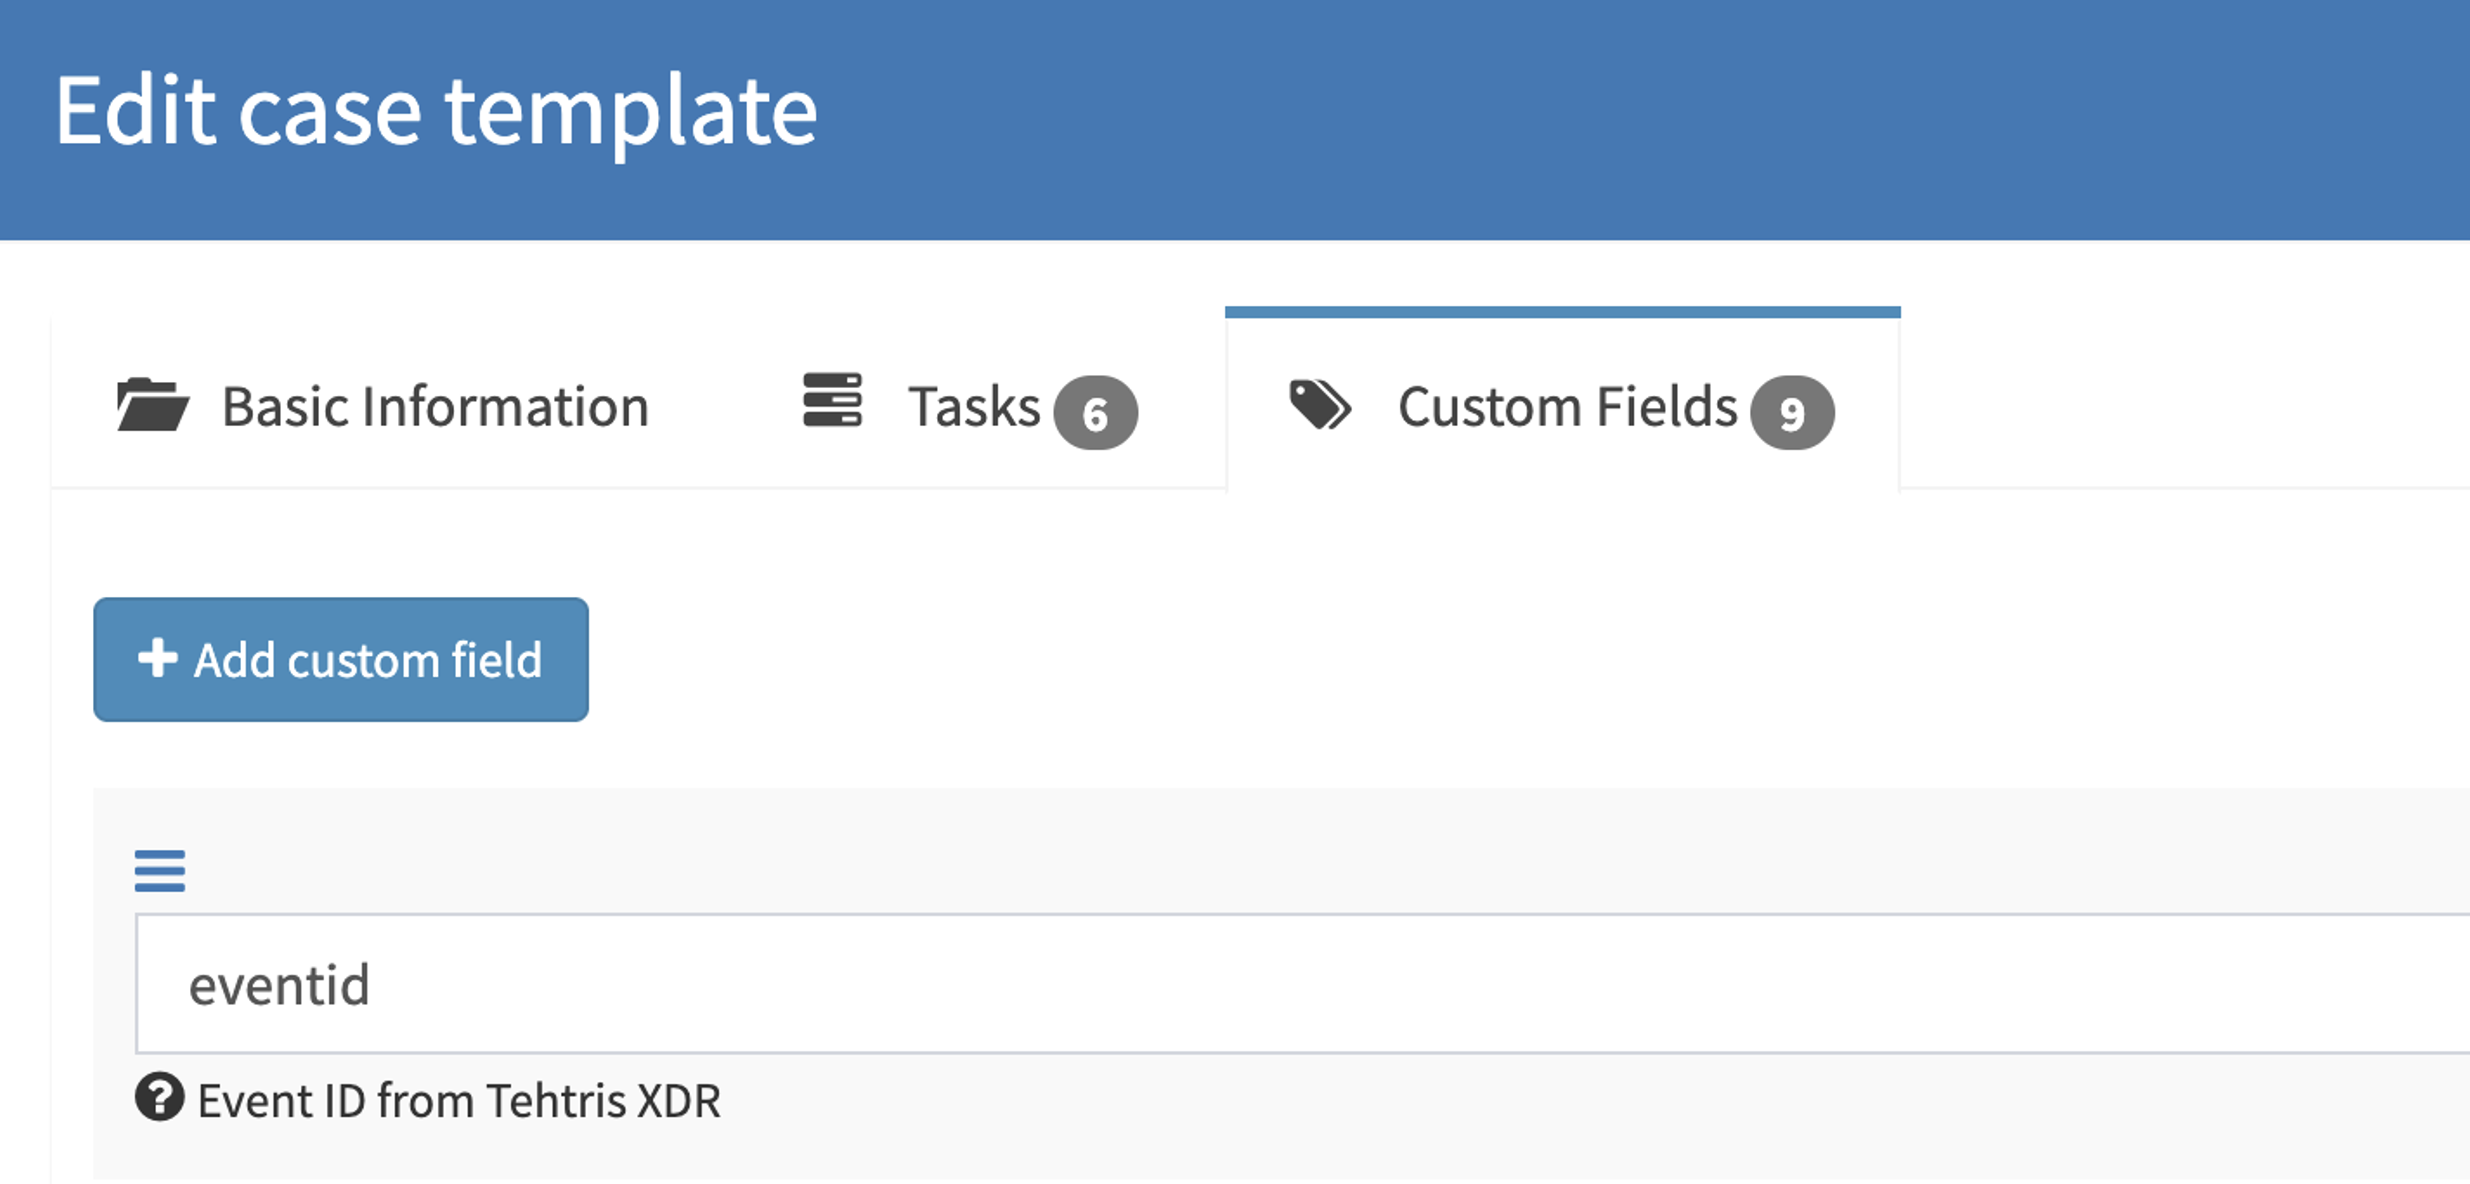
 As previously mentioned, custom field can be added in a case template. Case is an incident, case templates simplify the case creation by automatically creating the case with the minimum information and item in the case. Information, tasks and custom fields are item present in the case template.
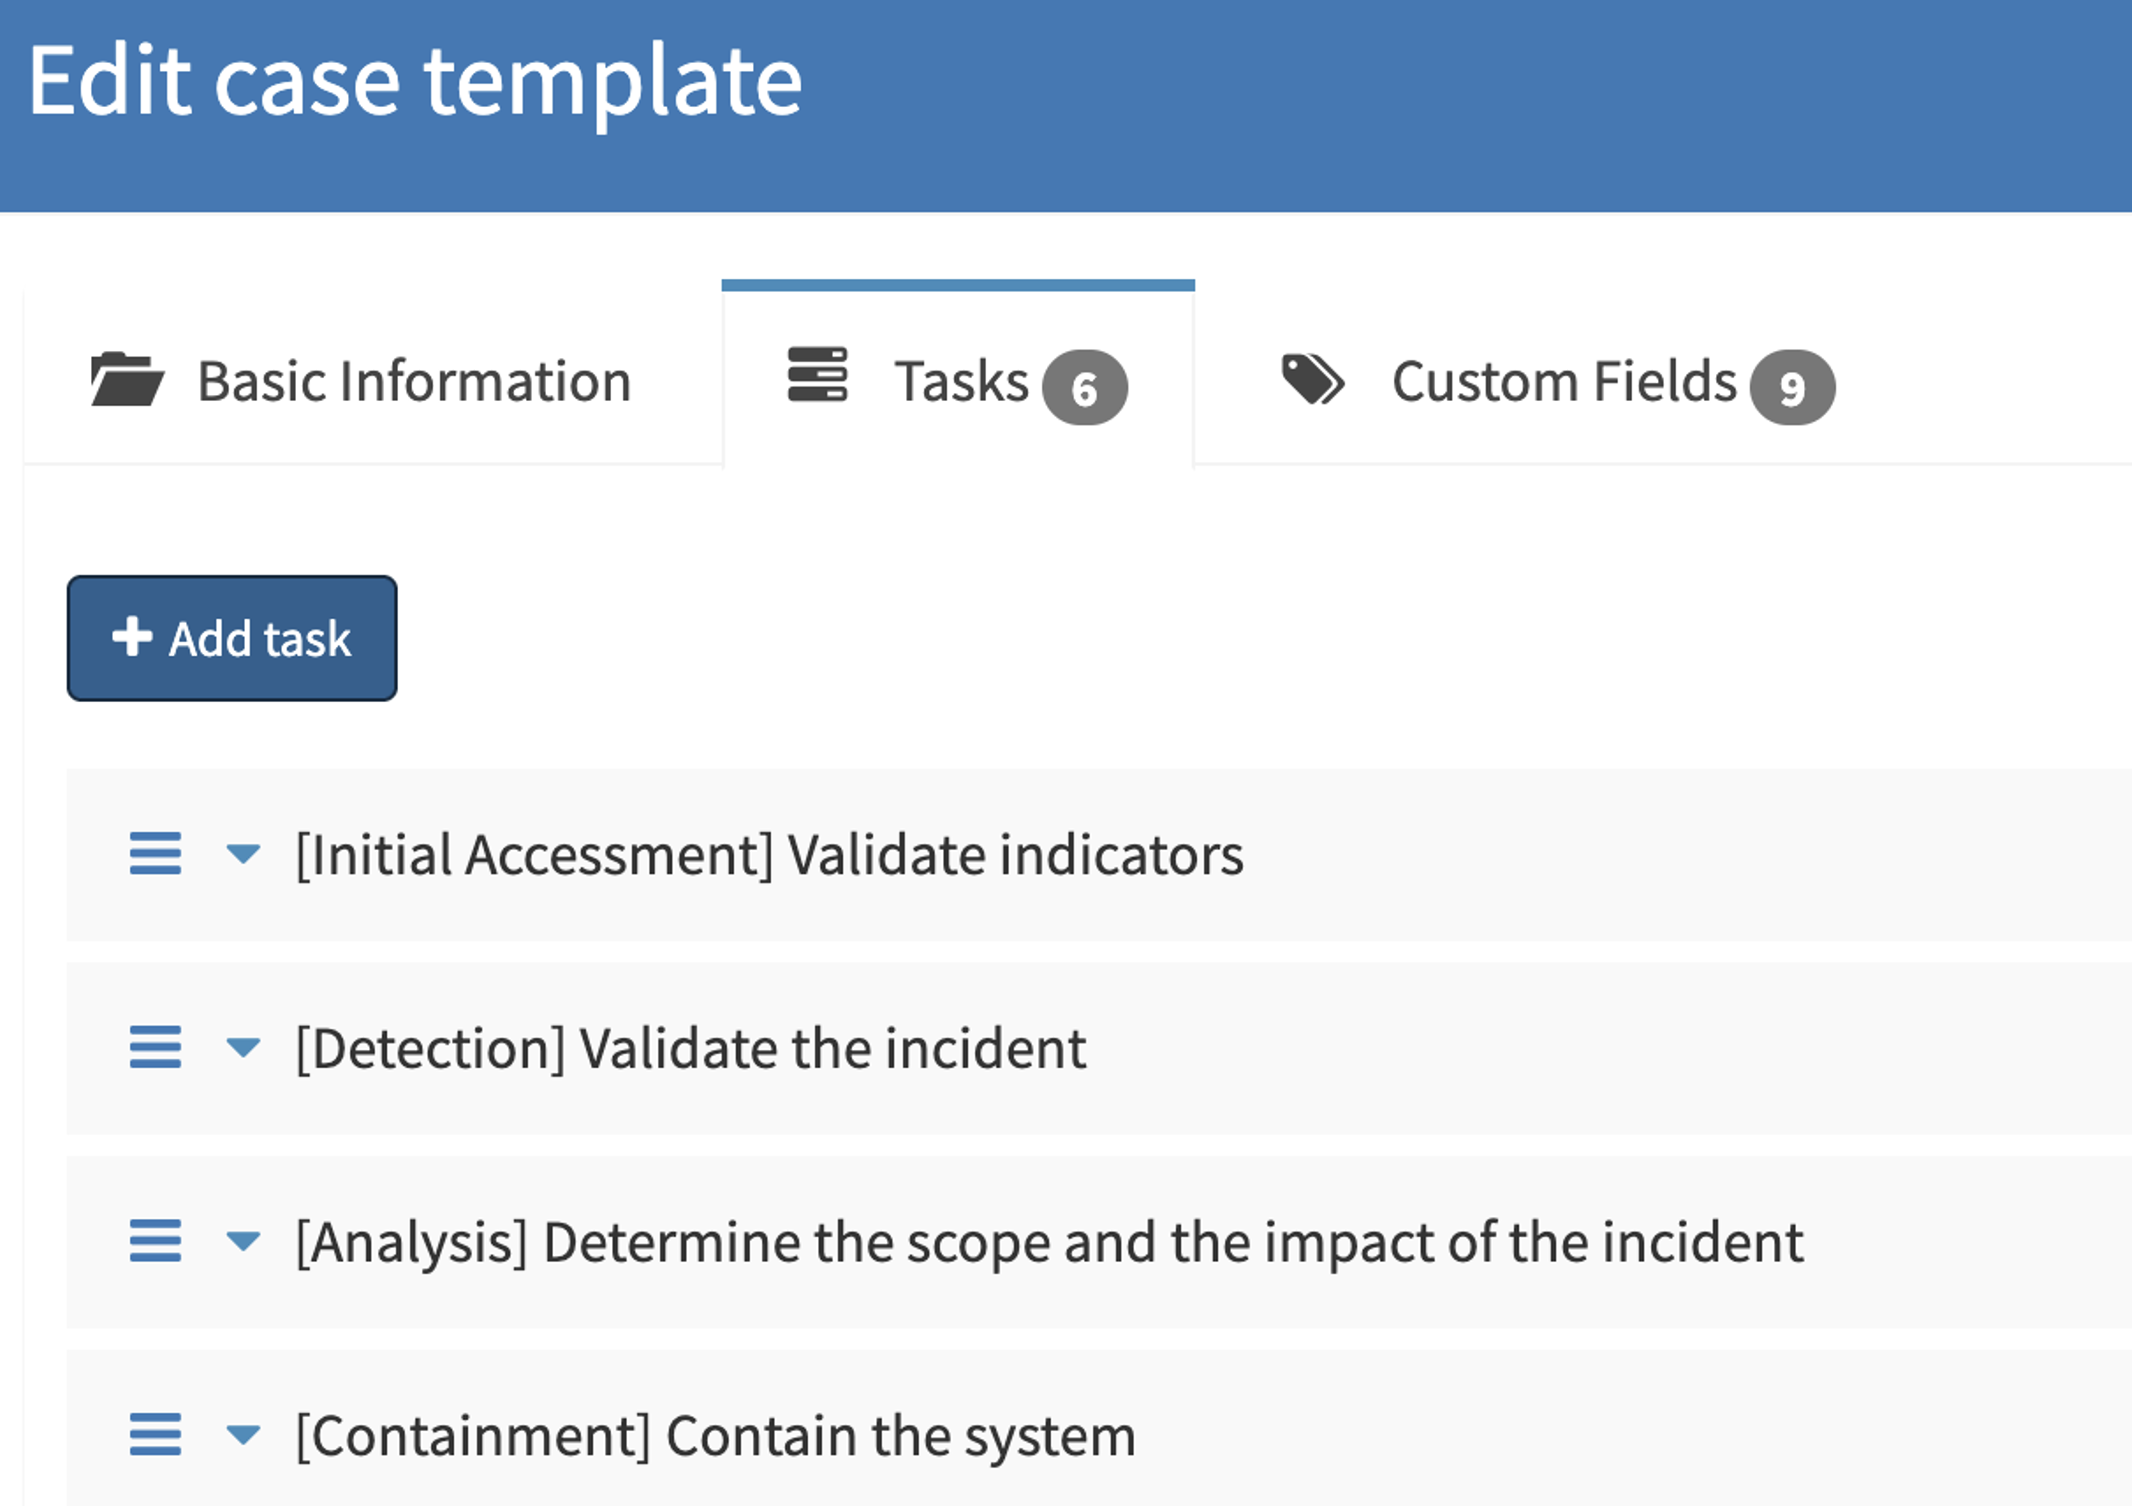 Tasks standardize investigation of incidents.
II/ Cortex
The strength of cortex resides in the actions it can do; analyze and respond. Those two functions, called analyzer and responder are the core of Cortex functioning.
Analyzer: How to analyze observables to add more contextualization and information to the case.
Responder: How to respond and bring an action to stop the threat ?
TheHive and Cortex are working together, TheHive will mainly serve as frontend application and Cortex bring the action done in backend. Actionable buttons are available in TheHive to perform actions that are describe by Cortex.
1. Analyzer / Responder creation
In the system that host TheHive and Cortex application, create a new directory called “Custom-Analyzer” and add the absolute path to the application.conf in cortex directory. Cortex will search on this repository to fetch the analyzers or responders.
In the following example:
- Analyzer directory is found in the /opt/Custom-Analyzers/analyzers
- Responder directory is found in the /opt/Custom-Analyzers/responders
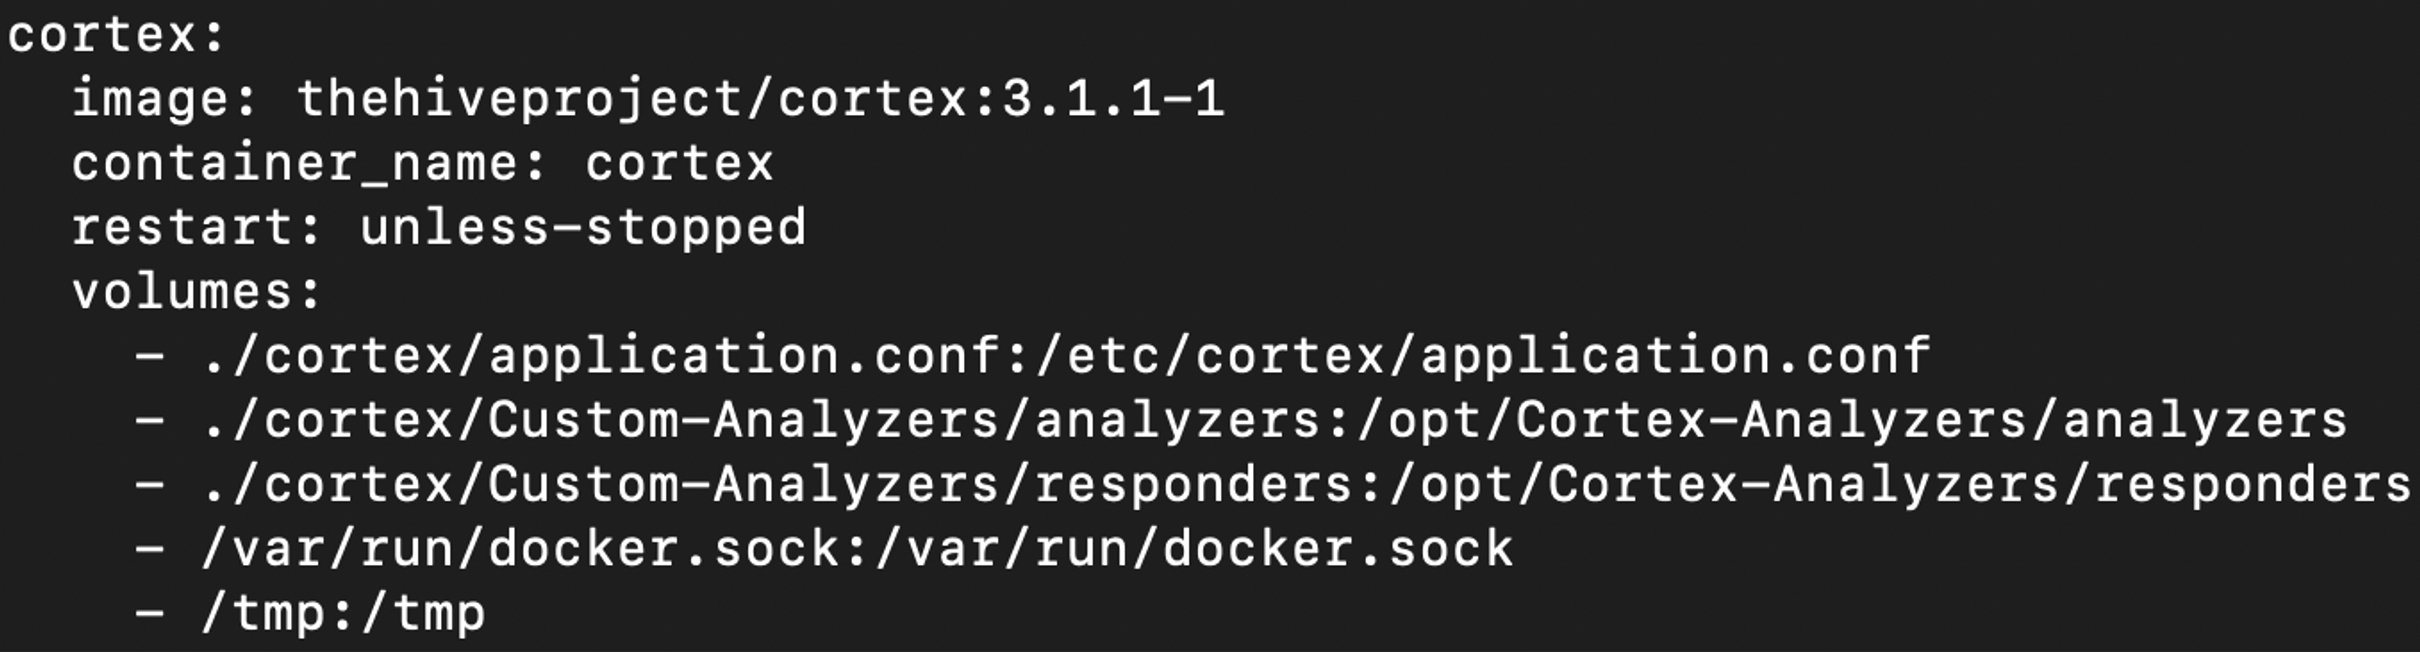
 For docker container, Cortex will also fetch the analyzers /opt/Cortex-analyzers/analyzers or /opt/Cortex-Analyzer/responders to search for different custom analyzer or responder.
You can map a host folder to /opt/Cortex-Analyzer/analyzer or responder. You can modify the file in your host system, the mapping will act like a file share.
Open docker-compose.yml file and modify it like the screenshot below:
 Analyzers and responders require 2 files:
- JSON file
- Python script
"name": "Analyzer_GetUser",
"version": "1.0",
"author": "SkallZou",
"url": "https://github.com/TheHive-Project/Cortex-Analyzers",
"license": "AGPL-V3",
"description": "Get user information based on username",
"dataTypeList": ["username"],
"baseConfig": "YahudCorp",
"config": {
"service": "GetUser"
},
"configurationItems": [
{
"name": "key",
"description": "API key for YahudCorporation",
"type": "string",
"multi": false,
"required": true
}],
"registration_required": true,
"subscription_required": false,
"service_homepage": "https://www.skallzou.github.org/",
"service_logo": {
"path": "assets/logo.png",
"caption": "logo"
},
"command": "YahudCorp/analyzer_getUser.py"
}
Every analyzer and responder that have a baseConfiguration for YahudCorp will have the same set of configuration item value. This avoid to fill the value of API key for each analyzer and responder creation.
dataTypeList indicates on what type of observable the analyzer can run. Analyzer run specifically on observable. If an observable type is not present, a custom observable types can be created. Those analyzers can be used for case enrichment. For example, if the observable is a hostname, the analyst would like to know what system is this, a domain controller, a backup server or a simple workstation ?
"command": "YahudCorp/analyzer_getUser.py" indicates the python script to run when the analyzer is being called.
Open your text editor and save the file as the file name you have put in your JSON config file, in my case it is analyzer_getUser.py.
In your python file, Importing the Analyzer or Responder library from cortexutils.analyzer is the first thing to do. That allows you to get the functions to interact with TheHive when calling the analyzer. If cortexutils is not installed, install it with pip.
service = self.get_param(‘config.service’)
Analyzer analyzes observables and generates a report.
Functions List:
- Summary (return dict(‘taxonomies’)): Write the report summary on the observable. Take 1 parameter (raw) corresponding to the result of the report.
- Report is stored in the attribute report: self.report({“result”:response.json()})
- Run(): Starting the analyzer algorithm
Example using summary:
taxonomies = []
level = "suspicious"
namespace = "tehtris"
predicate = self.service
if predicate == "GetSystem":
sysInfo = dict()
sysInfo['os'] = raw['result']['data'][0]['os']['pretty_description']
sysInfo['uuid'] = raw['result']['data'][0]['uuid']
sysInfo['tag'] = raw['result']['data'][0]['tags']
for i in ['os', 'uuid', 'tag']:
value = sysInfo[i]
taxonomies.append(self.build_taxonomy(level, namespace, predicate, value))
return {"taxonomies": taxonomies}
Creating an responder will always start with: from cortexutils.analyzer import Responder
Similar as Analyzer, responder requires two files to work:
- JSON file
- Python file
"name": "Responder_IsolateSystem",
"version": "1.0",
"author": "SkallZou",
"url": "https://github.com/TheHive-Project/Cortex-Analyzers",
"license": "AGPL-V3",
"description": "Isolate the affected system",
"dataTypeList": ["thehive:case_artifact"],
"baseConfig": "YahudCorp",
"config": {
"service": "isolation"
},
"configurationItems": [
{
"name": "key",
"description": "API key for YahudCorporation",
"type": "string",
"multi": false,
"required": true
}],
"registration_required": true,
"subscription_required": false,
"service_homepage": "https://www.skallzou.github.org/",
"service_logo": {
"path": "assets/logo.png",
"caption": "logo"
},
"command": "YahudCorp/responder_isolateSystem.py"
}
In the python script, here are two ways to display message in the output:
- Return Self.report(“print value”)
- Return self.error(“print error”)
- AddTagToArtifact ({ "type": "AddTagToArtifact", "tag": "tag to add" }): add a tag to the artifact related to the object
- AddTagToCase ({ "type": "AddTagToCase", "tag": "tag to add" }): add a tag to the case related to the object
- MarkAlertAsRead: mark the alert related to the object as read
- AddCustomFields ({"name": "key", "value": "value", "tpe": "type"}): add a custom field to the case related to the object
if self.service == "GetSystem":
return [self.build_operation("AddTagToArtifact", tag=self.uuid), self.build_operation("AddTagToArtifact", tag=self.os), self.build_operation("AddTagToArtifact", tag=self.tag)]
elif self.service == "GetUser":
return [self.build_operation("AddTagToArtifact", tag=self.userType)]
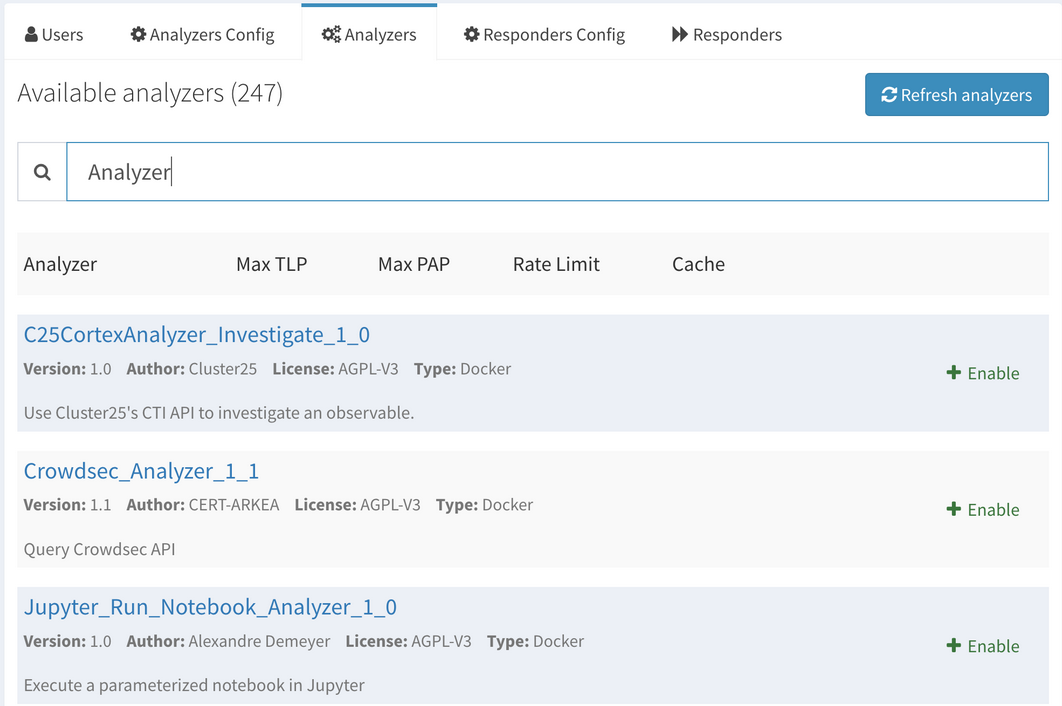
Enable the analyzer or responder
After creating the .json file for the analyzer/responder, the analyzer or responder is still not enable in Cortex, a manual activation is necessary. Click on Organization => Analyzers or Responders => Search for the analyzer => Click on Enable
 The current and default docker container does not have the dependencies by default. If the container reboots, dependencies must be install again (Python, pip3, must be installed…).
Here are below some dependencies for cortex:
apt update
apt install python3 python3-pip
pip install cortexutils
pip install requests
You might also face a old distrib for the old docker, some sources are not unavailable:
cd /etc/apt/
cp sources.list sources.list.backup
echo 'deb http://deb.debian.org/debian bullseye main' > sources.list
echo 'deb http://security.debian.org/debian-security bullseye-security main' >> sources.list
echo 'deb http://deb.debian.org/debian bullseye-updates main' >> sources.list
apt update
apt full-upgrade
apt install python3.9 python3-pip
If public key is missing, use apt key.
apt-key adv --keyserver keyserver.ubuntu.com --recv-keys
You can install all the dependencies and save the docker image for the next build, then use this image so the dependencies will still remain after rebooting.
apt install python3 python3-pip
pip install cortexutils
pip install requests
cp sources.list sources.list.backup
echo 'deb http://deb.debian.org/debian bullseye main' > sources.list
echo 'deb http://security.debian.org/debian-security bullseye-security main' >> sources.list
echo 'deb http://deb.debian.org/debian bullseye-updates main' >> sources.list
apt update
apt full-upgrade
apt install python3.9 python3-pip